Portrait Lighting for Beginners in 2026: 5 Setups That Work Every Time
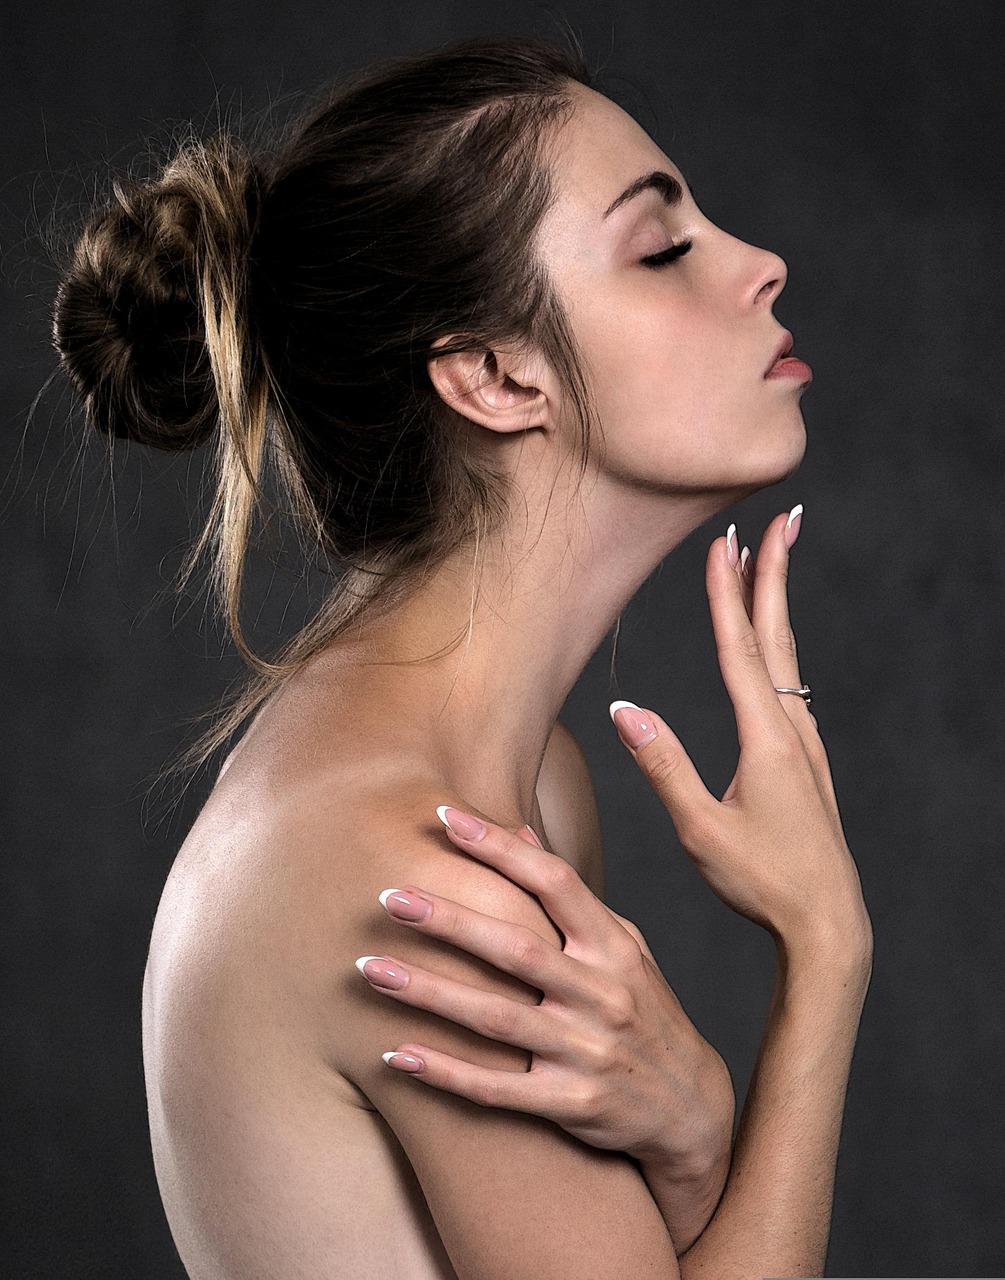
Portrait lighting has a reputation for being a deeply technical subject requiring expensive equipment and extensive training. The reality is more accessible: five lighting setups cover the vast majority of portrait work, and three of them require nothing beyond what you probably already have.
Why Lighting Matters More Than Camera or Lens
I've seen identical cameras produce dramatically different portraits based solely on lighting — the same face, different light, completely different emotional quality. Harsh midday sun creates unflattering shadows and squinting; the same face in open shade looks completely different. The camera recorded what the light provided. This is not a minor factor.
The reason lighting education gets skipped in beginner photography resources is probably that light is free and cameras are sellable. But if you want to improve your portraits, learning to see and work with light pays higher returns than any camera or lens upgrade.
Setup 1: Window Light (The Most Reliable Natural Light Setup)
A window on an overcast day is nature's softbox — large, diffused, even light that wraps around faces and creates gentle transitions from highlight to shadow. Position your subject so the window light falls at 45 degrees to their face (not straight on, not from behind). The closer the subject is to the window, the softer the light; farther away, harder.
On a sunny day, the direct sunlight coming through a window is too harsh. Either wait for cloud cover, use a sheer curtain as a diffuser, or position so only reflected (not direct) light reaches your subject.
The most common mistake with window light: positioning the subject too far from the window. At five or six feet from the window, the light becomes significantly harder and less flattering than at one or two feet. Move your subject closer to the light source.
Setup 2: Open Shade (The Reliable Outdoor Natural Light Setup)
The shadow cast by a building, trees, or an overhang creates what photographers call "open shade" — indirect light from the sky above that's soft and even without the harshness of direct sun. Position your subject so their face opens toward the brightest area of open sky (not toward a building or solid surface). This creates soft, directional light that works for most portrait situations.
The mistake: facing subjects away from open sky toward a darker surface. The light should fill their face from in front, not come from behind.
Setup 3: Golden Hour (The Dramatic Natural Light Option)
The hour after sunrise and the hour before sunset provide warm, low-angle, golden light that flatters skin tones and creates distinctive shadows. This light moves quickly — the angle and quality change noticeably every five minutes — and requires knowing what you want before you start shooting.
The positioning consideration: the low angle means shadows fall dramatically to one side. Either use this intentionally (rim lighting from behind, golden light from the side) or position so the sun is in front of and above the subject at a slight angle, which provides front light without the flat look of midday sun.
Setup 4: Single Speedlight with Umbrella (The One-Light Studio Setup)
A speedlight ($80-200) with a shoot-through umbrella ($20-40) creates a portable, affordable studio light that works indoors or outdoors. The umbrella diffuses and enlarges the light source, creating much softer light than a bare flash.
Position the light at about 45 degrees to the subject's face and slightly above eye level, aimed down at about 45 degrees. This "Rembrandt lighting" position creates a small triangle of light on the cheek opposite the light source — a classic flattering portrait pattern.
The key skill: learning to balance the flash exposure with the ambient light so the background doesn't go completely black (which looks unnatural) but the flash is still providing the primary light.
Setup 5: Budget LED Panel for Indoor Portraits
A bi-color LED panel ($50-100) on a light stand provides continuous light for portraits — you can see exactly what you're getting before you shoot, which is a significant advantage for learning. At close range, even a modest LED panel provides enough light for indoor portraits.
The limitation: LED panels are typically less powerful than flash, which limits you to larger apertures or higher ISOs in bright environments. For controlled indoor situations, this isn't a problem.
Reading the Light Before Setting Up
The most valuable skill for portrait lighting isn't knowing how to set up your flash — it's being able to look at a scene and understand what the light is doing before you put your subject in it. Hold up your hand and observe: where are the shadows falling? How hard or soft are the edges? Where is the most flattering light in this space?
Doing this consciously before every portrait session — even when shooting in natural light with nothing to set up — develops the eye faster than any technical exercise.
Honest Bottom Line: Window light and open shade produce excellent portraits with no equipment beyond a camera. Golden hour provides dramatic natural light that requires timing but no additional gear. A single speedlight with umbrella creates a versatile portable studio for under $250. The most important skill is learning to see what the light is doing before placing your subject in it.
Daniel Wu is an artist, designer, and creativity writer who covers visual arts, music, writing, and the creative process with genuine practitioner insight. With a BFA in Graphic Design and 12 years of professional creati...
![Smartphone Photography [2026]: How to Actually Take Better Photos Without a Camera](/img/posts/smartphone-photography-honest-2026-16d0eaf3.jpg)
![Street Photography [2026]: 7 Techniques for Capturing Real Life](/img/posts/fix-street-photography-honest-guide-202-49cfd50c.jpg)
![Film Photography in [2026]: Is It Worth the Cost and the Effort?](/img/posts/fix-film-photography-revival-honest-202-8ca26b63.jpg)
![Why I Started Shooting Film in [2026] (And What I Wish I'd Known [2...](/img/posts/1526170375885-4d8ecf77b99f.jpg)